Recessed curtain track profile
Friday, 09 October 2026 10:55

Recessed curtain track profile The Blog Vagenas

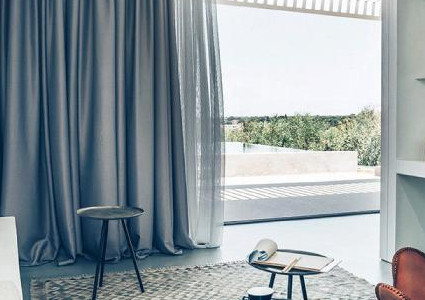
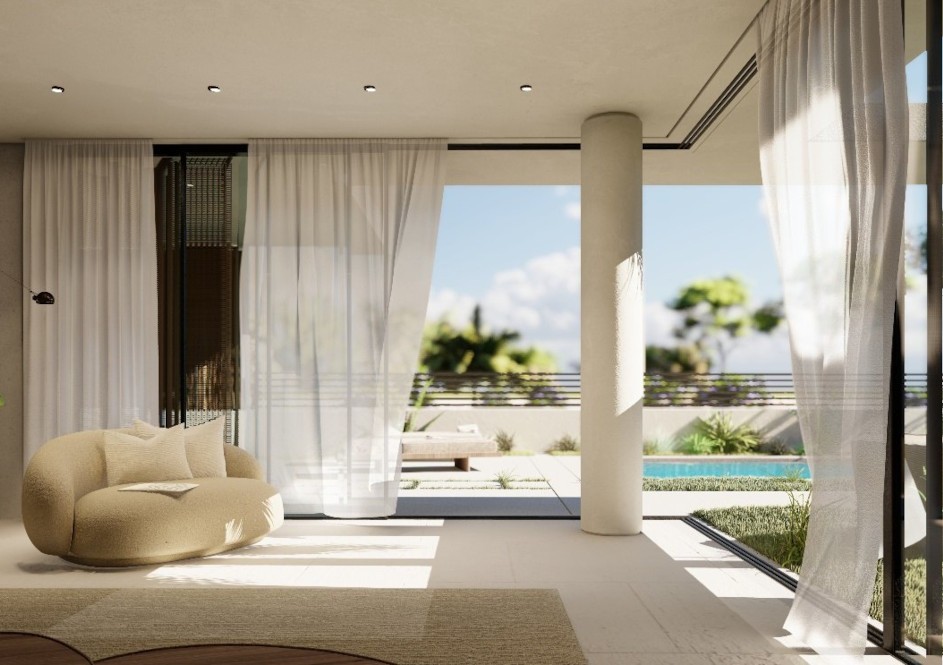
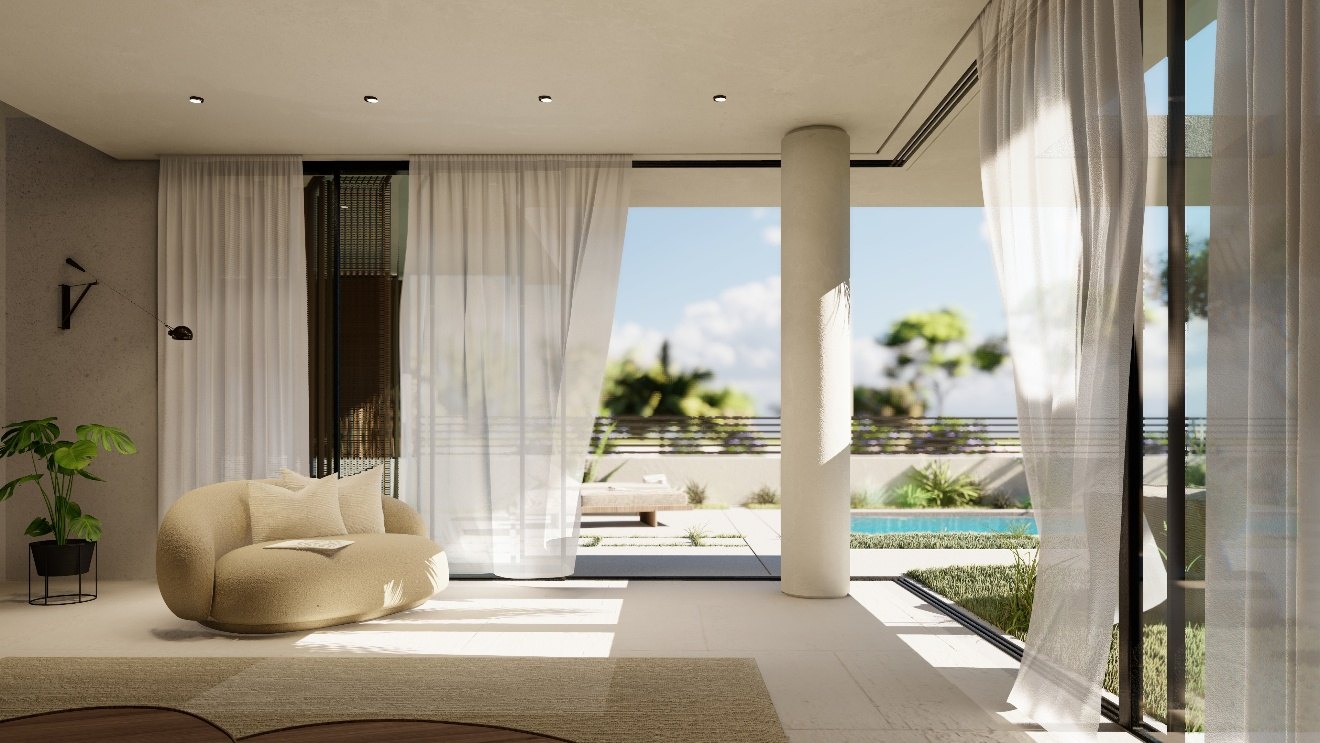
Living room with curtains hanging from a recessed track in the ceiling Friday, 09 October 2026 10:55

Invisible  ·  Made to disappear

Recessed curtain track profile

An aluminium profile that is built into the plasterboard ceiling and holds the curtain track out of sight. The plaster finishes flush against it, so the curtain hangs from a narrow slot in the ceiling and the track is hidden.

FitsSomfy Glydea, Somfy Movelite and Brain curtain tracks, motorised or manual
ColoursWhite or black from stock, custom colours on request
InstalledDuring construction, together with the ceiling
ProtectsThe track goes in last, clear of site dust, plaster and weather

Overview

Built in with the ceiling

The profile is fixed while the ceiling is being built. The curtain track is measured and fitted at the end, so it is not exposed to plaster, paint, dust or weather on site.
Built in with the ceiling
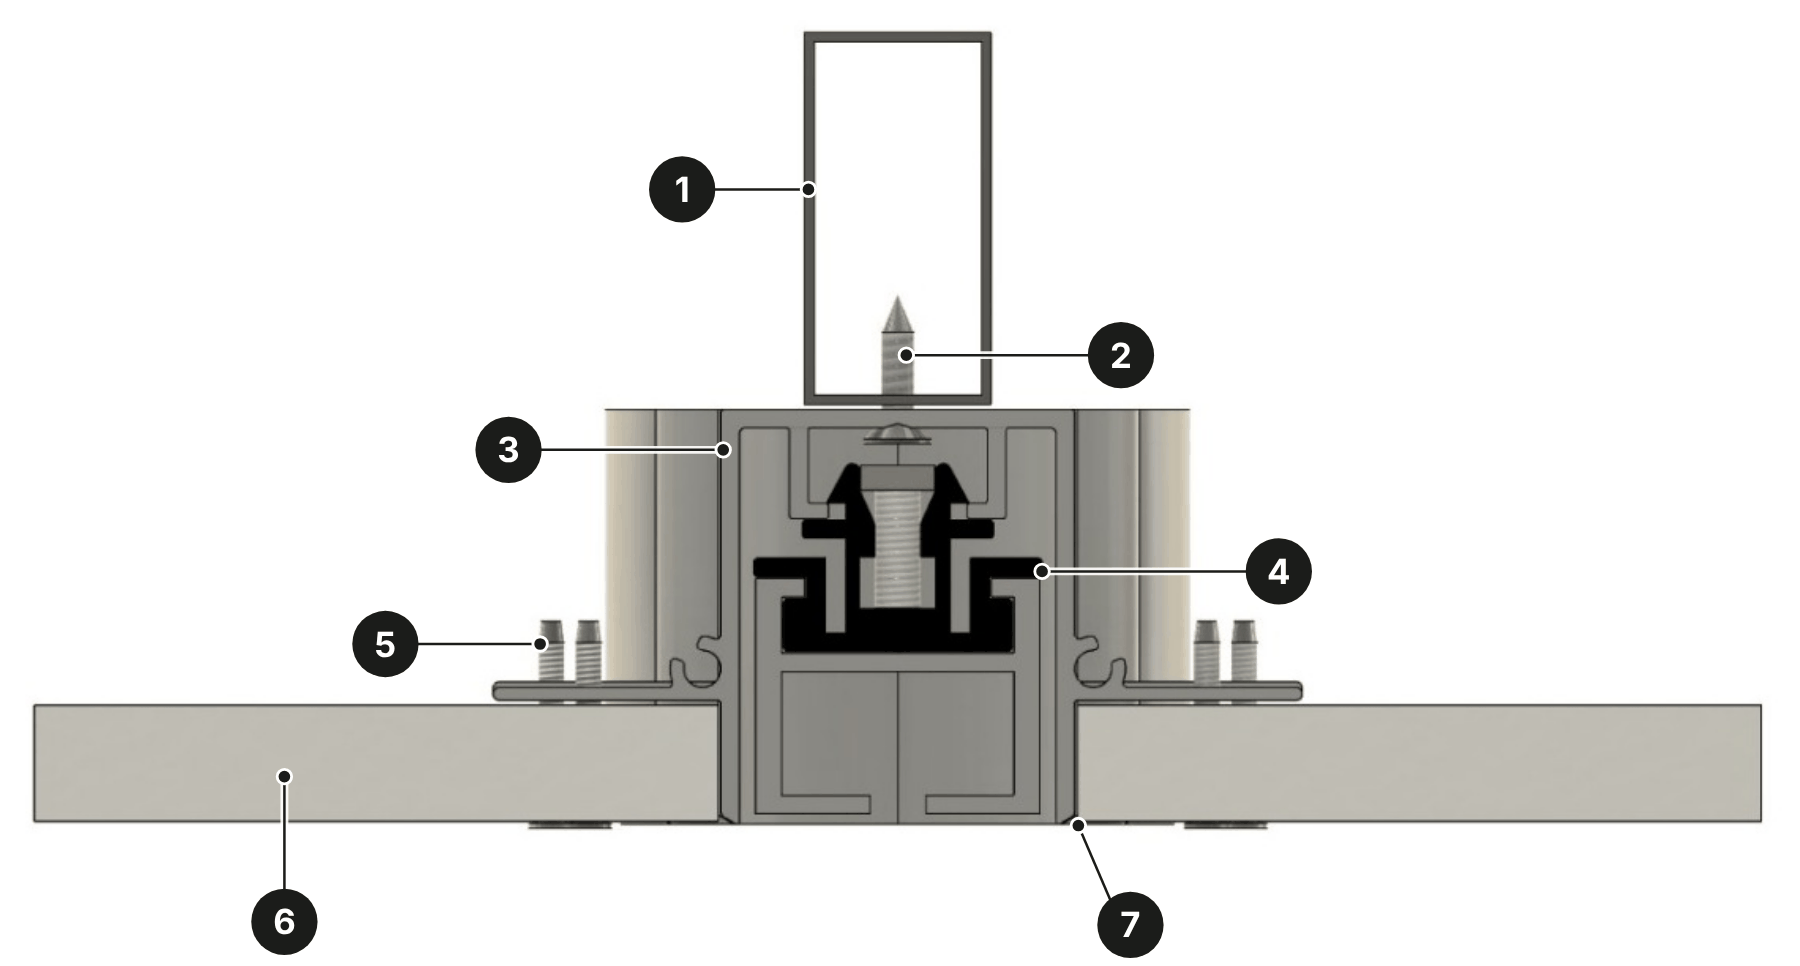
Ceiling frame
Fixing screw
Recessed profile
Track and suspension plate
Board screws
Plasterboard
Plaster finishes flush with the profile
Assemble and fixJoin the profile to its end pieces with the connecting pins and screw it to the ceiling frame.
Board the ceilingCut the plasterboard with the template and screw it to the flanges of the profile.
Plaster and paintMesh if wanted, then plaster up to the edge of the profile and paint.
Measure and orderMeasure inside the finished profile and order the track to that length.
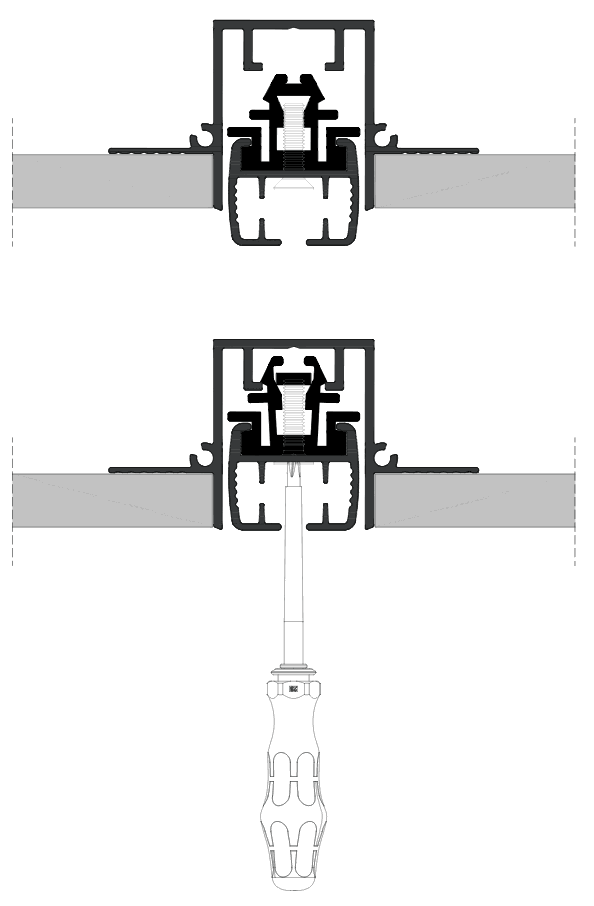
Fit the trackPlace the track in the profile and tighten the screws of the suspension plates.

Seen from below

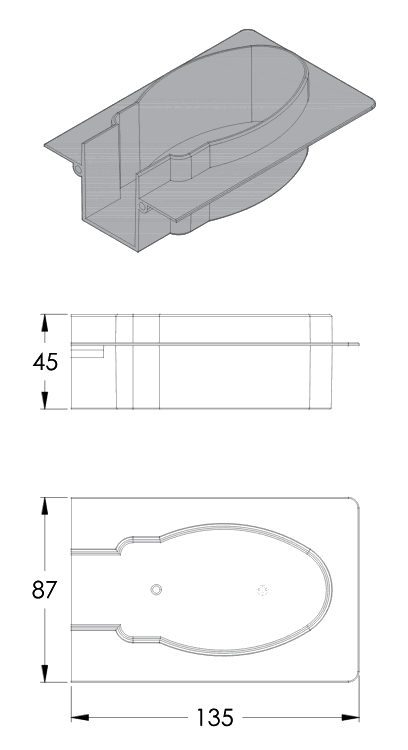
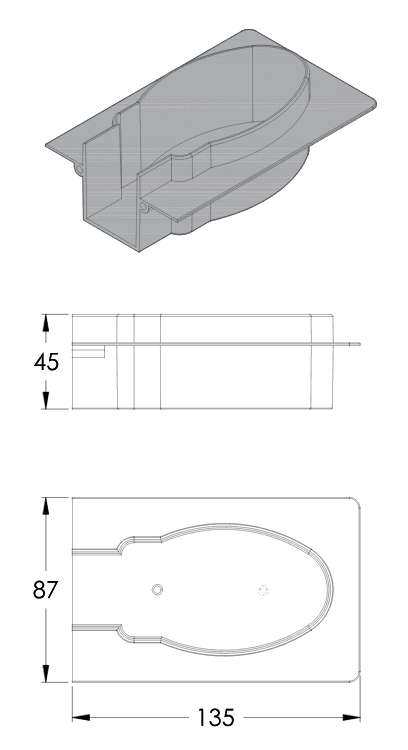
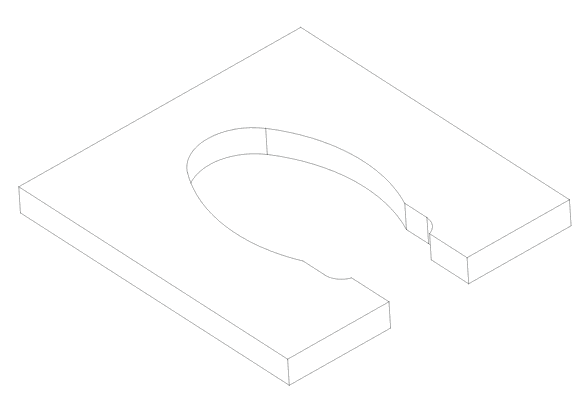
In the finished ceiling the profile reads as a single slot. At one end it widens into the motor cover, which makes room for the motor of the track.

The edge and the inside of the profile stay visible in the slot, so its colour matters: white or black from stock, or a custom colour to suit the ceiling.
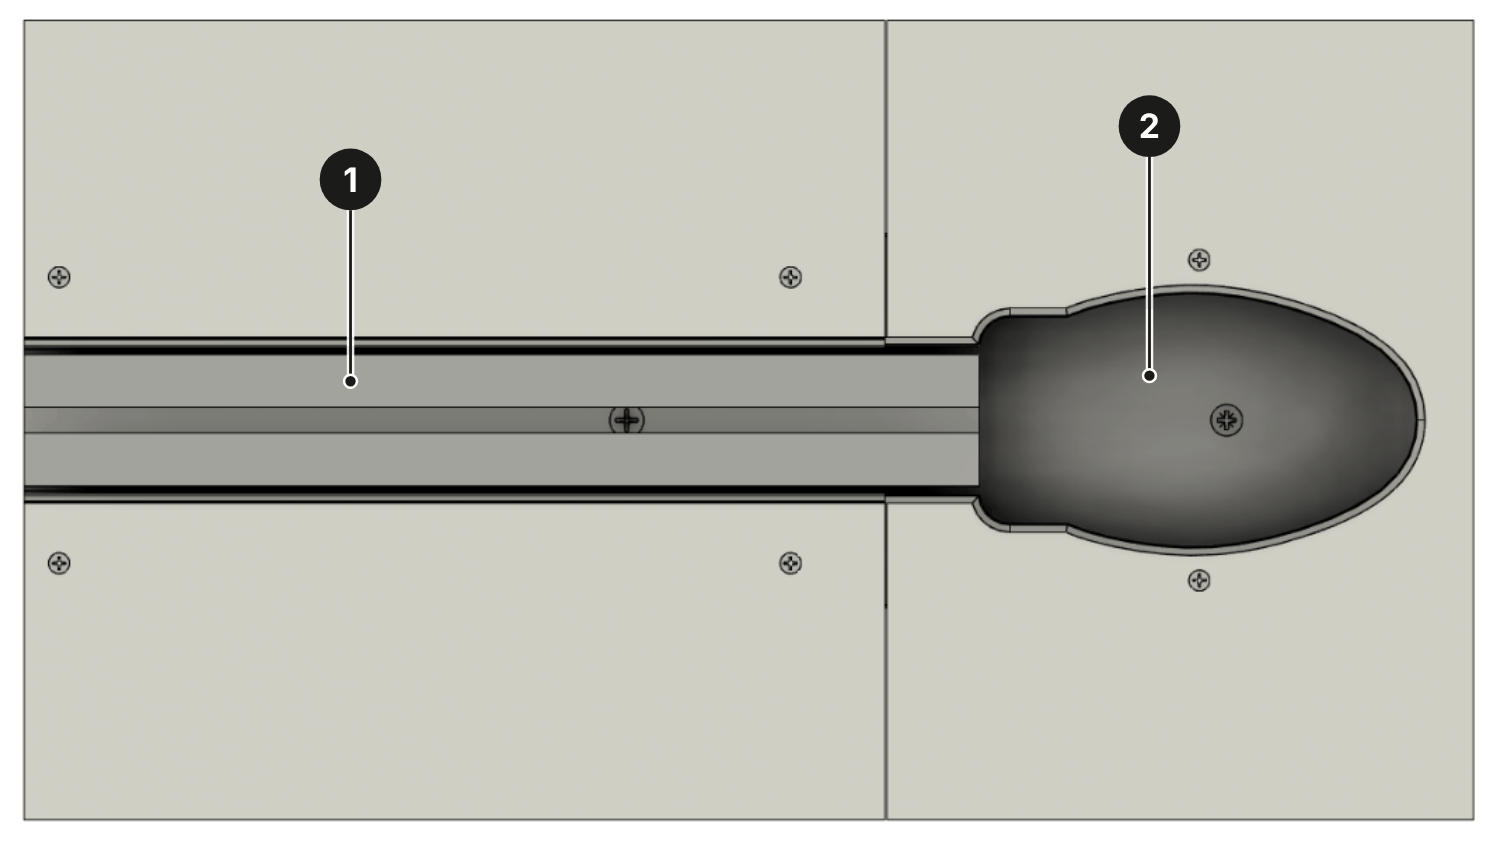
Track slot
Motor cover
Seen from below

Terminology

The parts, by name

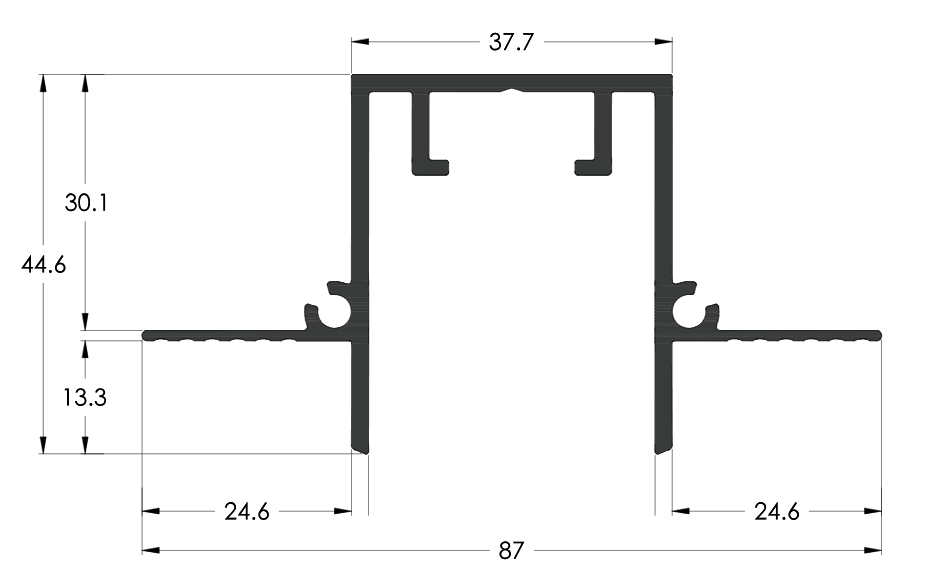
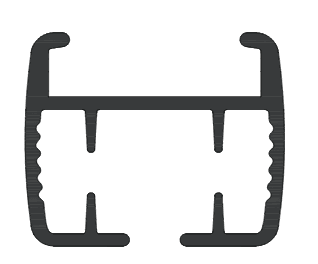
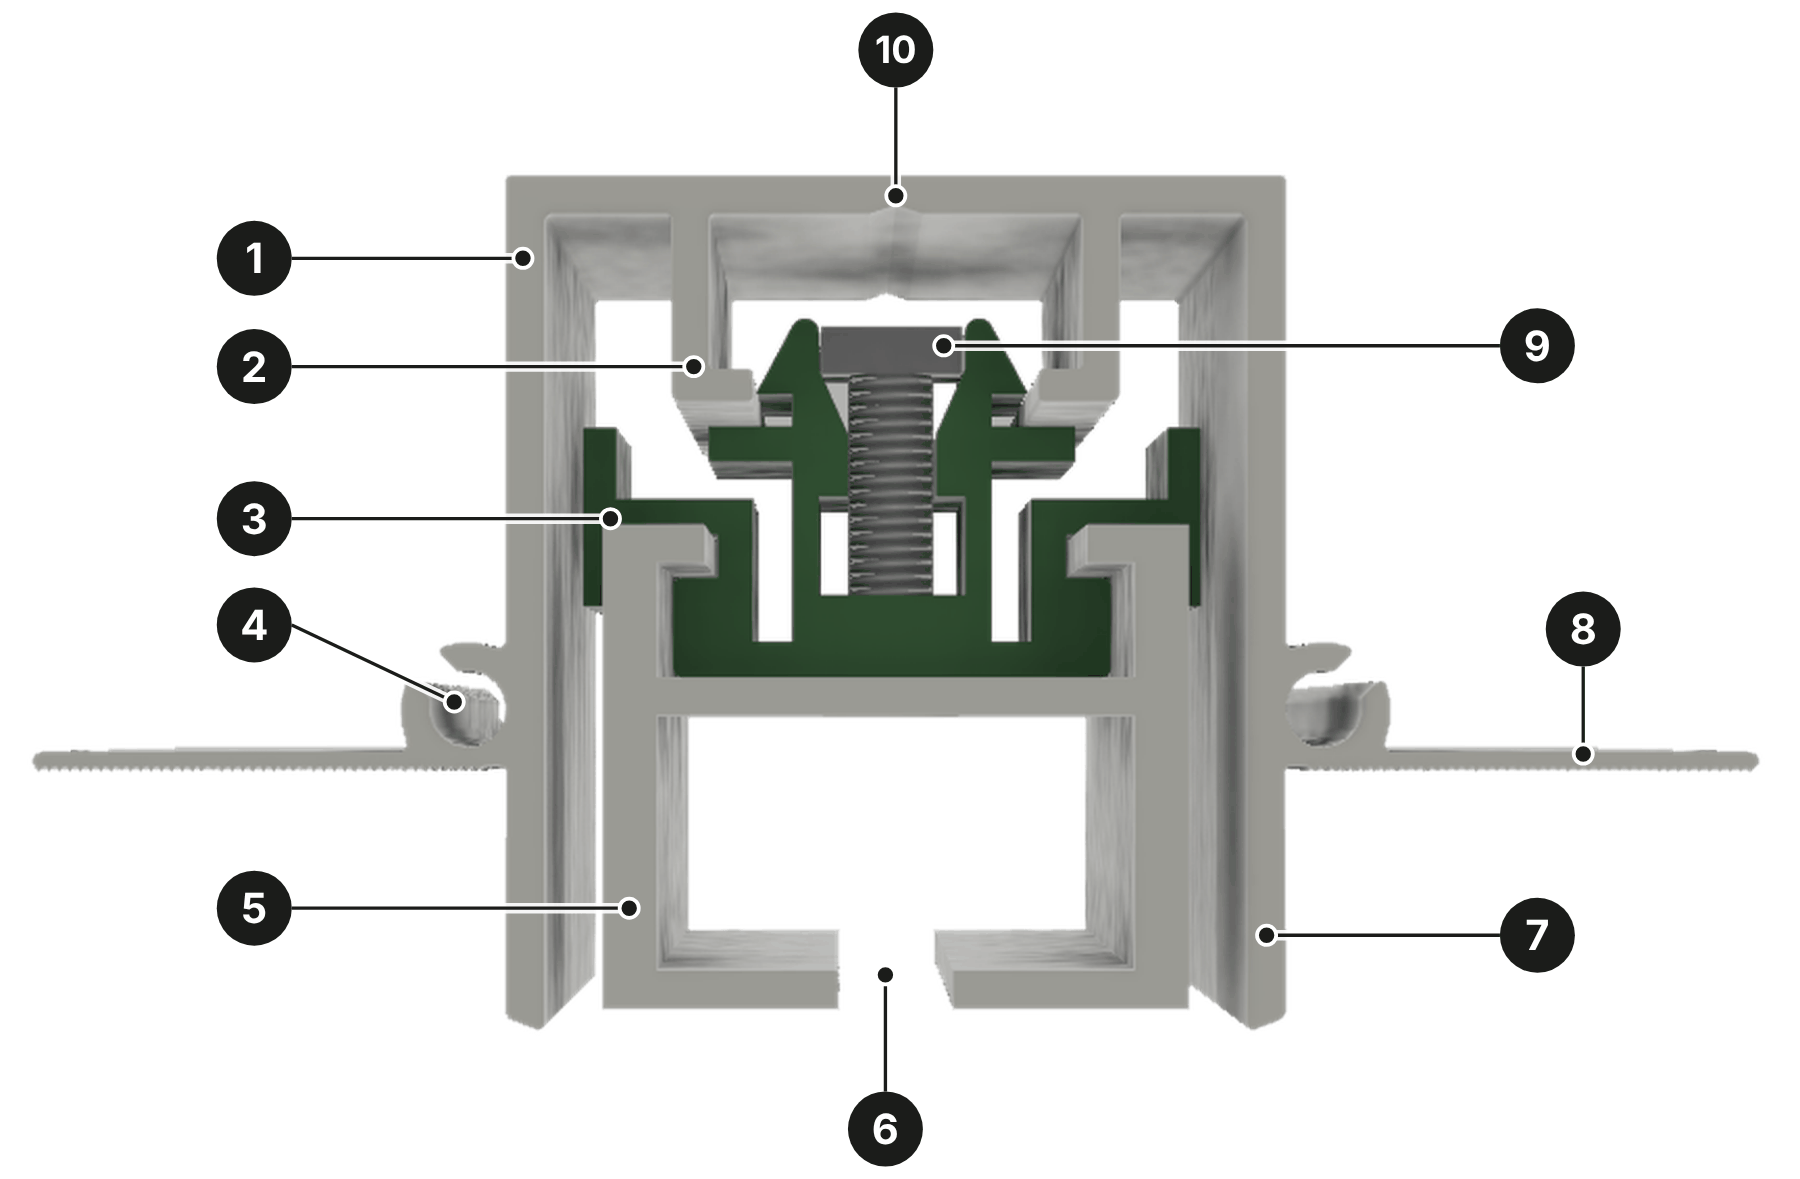
The profile seen end-on, with a curtain track fitted. The numbers match the terms below.
The parts, by name
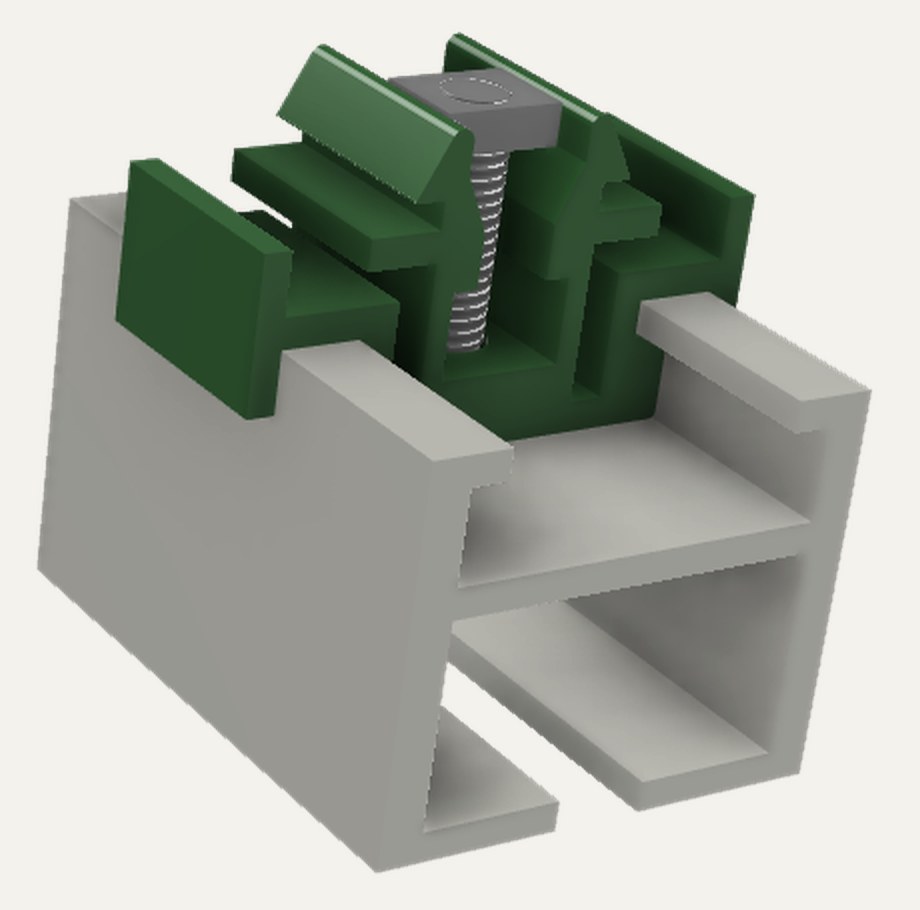
Suspension plate and screw on a length of curtain track, shown without the profile.
Recessed profileThe aluminium profile that is built into the plasterboard ceiling and houses the curtain track. Also called the guide.
Mounting railsTwo hooked legs under the top of the profile. The suspension plate locks onto them.
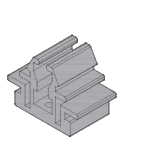
Suspension plateThe patented part that hangs the curtain track inside the profile. Shown in green.
Pin channelA round channel along each side of the profile. Connecting pins fit into it to join the profile to the end pieces and to further lengths.
Curtain trackThe Somfy (Glydea or Movelite) or Brain track, held inside the profile with its slot facing down.
Track slotThe opening under the track that the curtain gliders run in. With the edge of the profile, it is all that shows in the finished ceiling.
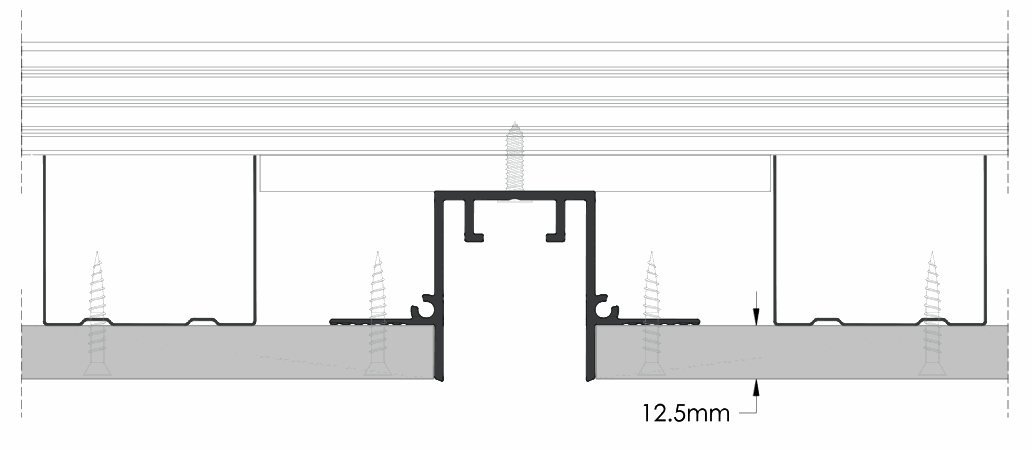
LipThe 13.3 mm of profile below the flange. The 12.5 mm plasterboard butts up to it and the plaster finishes level with its edge.
Plaster flangeThe flat wing on each side. The plasterboard is screwed to it.
Clamping screwThe screw in the suspension plate. It is tightened until resistance is felt, never overtightened.
Centring grooveA fine groove along the middle of the top. The Ø4.5 mm fixing holes go along it, every 400⁠–⁠500 mm.
RecessedSet into the ceiling instead of fixed below it, so nothing projects past the finished surface.
FlushLevel with the surface around it. Here, the plaster and the bottom edge of the profile meet in one plane.

System

Profiles and accessories

Drywall installation profile
Curtain track for Somfy / Brain motor
Curtain track for Somfy / Brain motorCompatible systems: Somfy Glydea, Somfy Movelite, Brain.

System accessories

Invisible motor cover for Somfy
Invisible motor cover for Brain
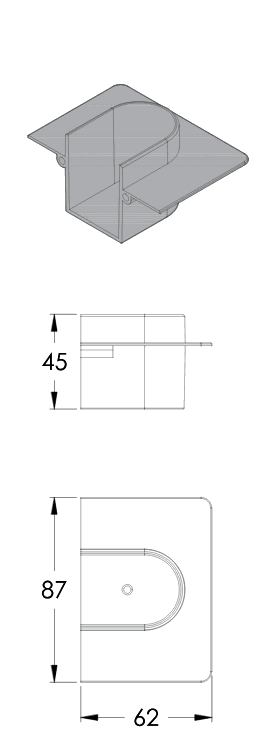
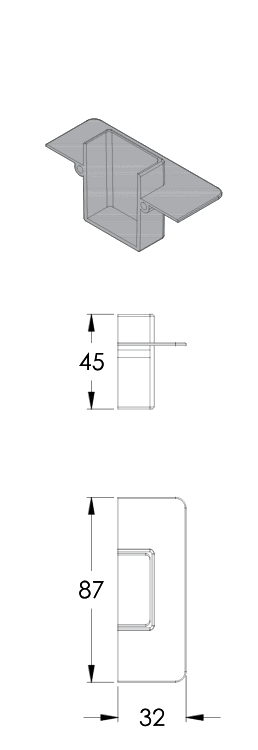
Invisible end cap for motorised tracks (Somfy / Brain)
Invisible end cap for manual tracks made with the profile and pulley of the electric mechanism
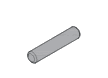
Connecting pin for the profileConnecting pin for the profile
Invisible track suspension plateInvisible track suspension platePatented

Installation

Installation guide

The five stages below follow the INVISIBLE installation guide. Open a stage to see its drawings and notes.

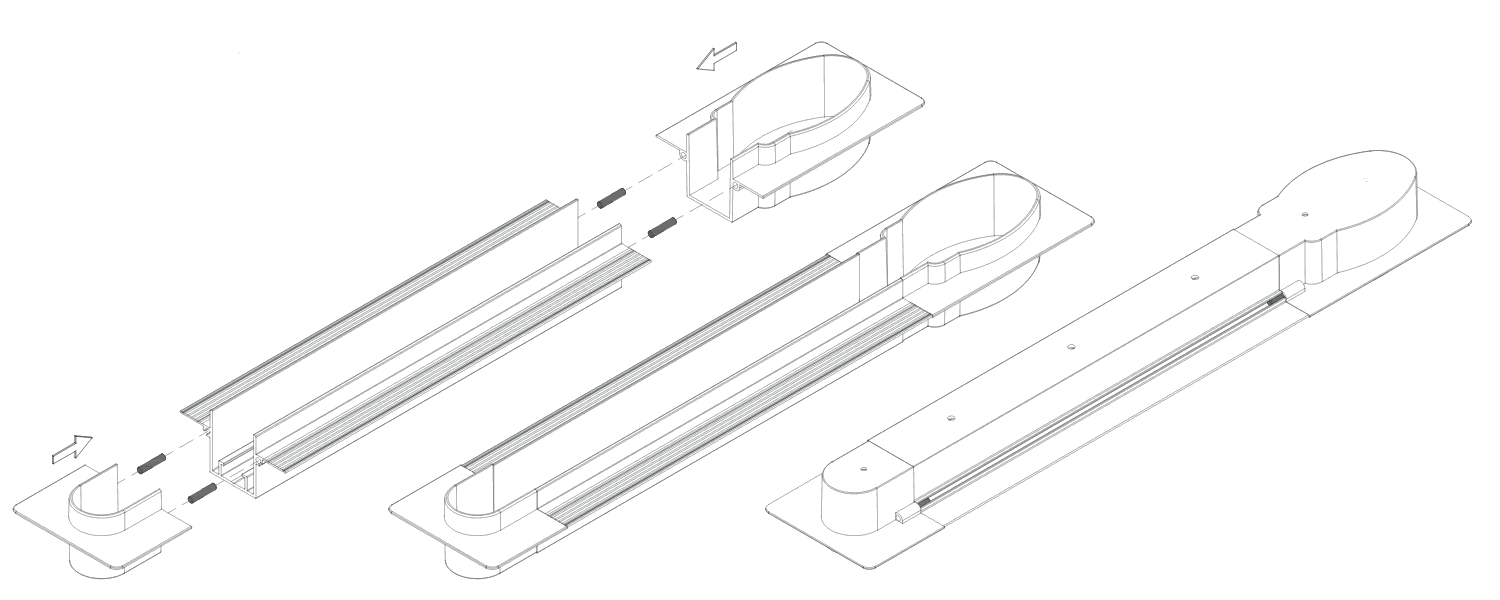
1Assembling the guide
Assembling the guide

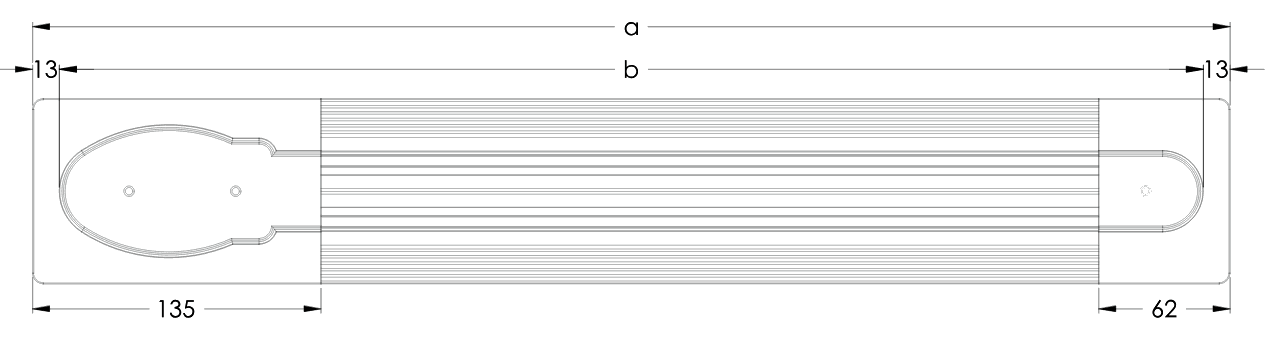
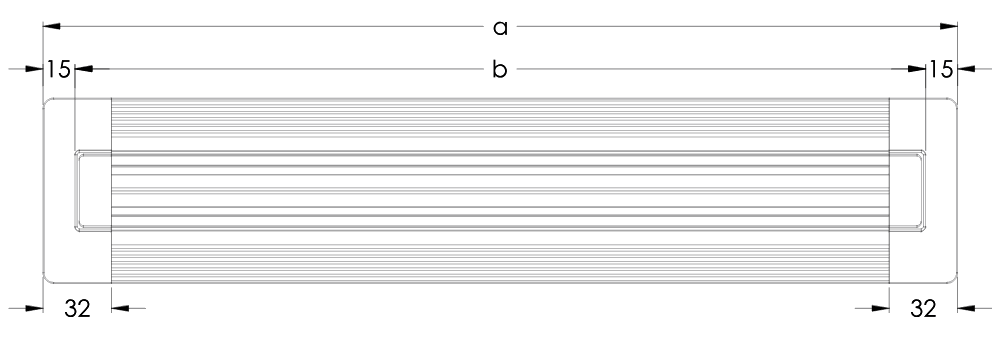
How the profile connects to the end pieces depends on the type of use (manual or motorised) and the type of motor (Brain or Somfy). The drawing on the right shows the back view.
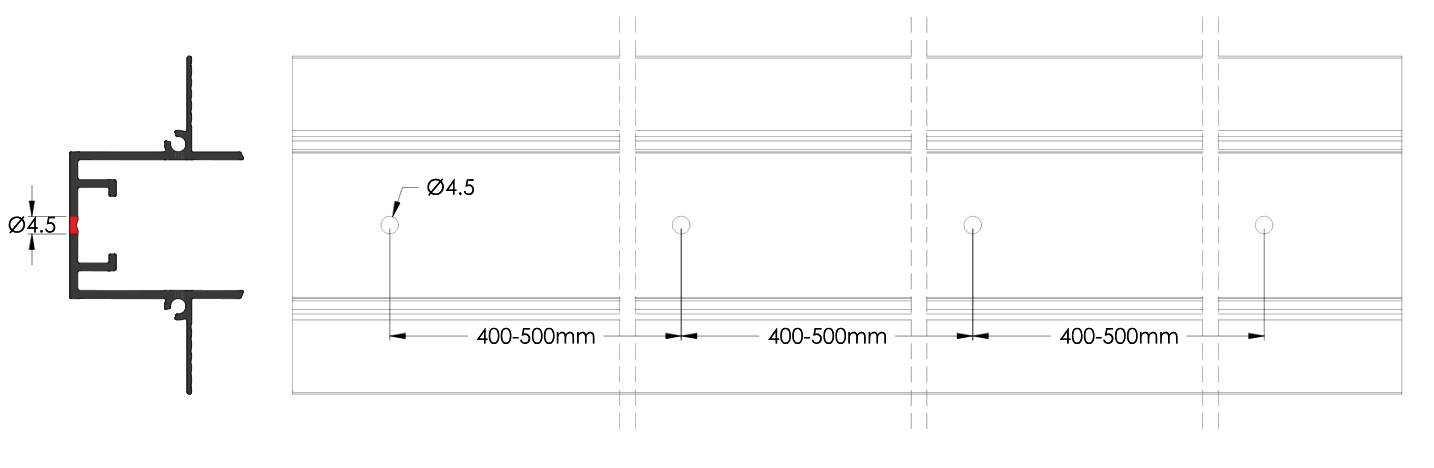
Fixing holes Ø4.5 mm through the top of the profile, every 400⁠–⁠500 mm.

System length and track length

Motorised (Somfy / Brain)
Manual
Manual

aoverall system length
boverall mechanism length

To have the track made, give dimension b.

For long lengths, use shorter profiles joined together with a connecting pin.

2Plasterboard cut-outs

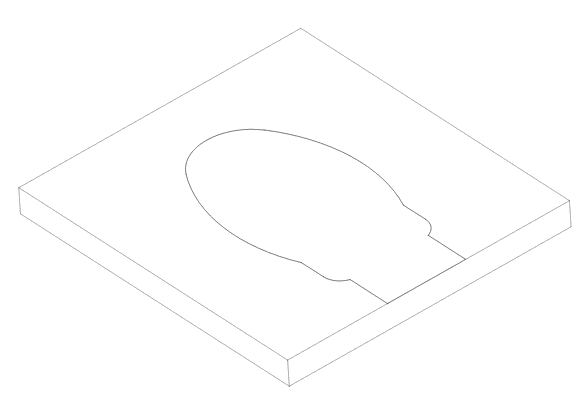
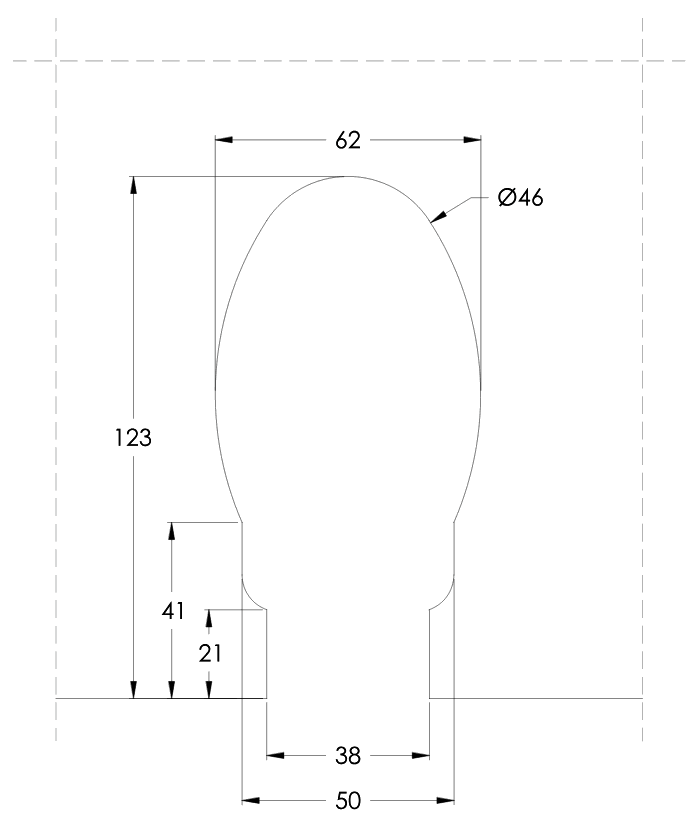
To mark the plasterboard to the outline of the motor cover or the end cap, use the cutting templates included in the package.
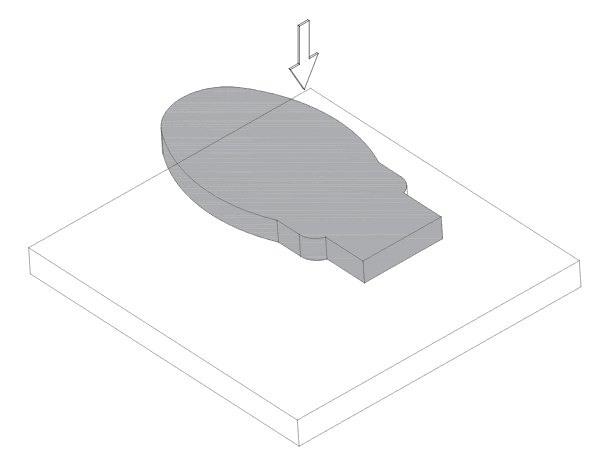
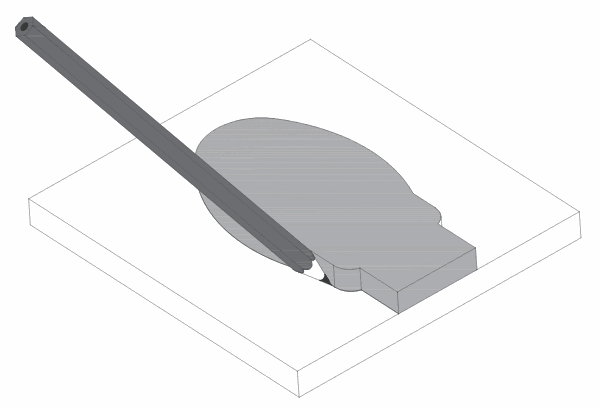
Place the template on the plasterboard
1Place the template on the plasterboard
Trace around it
2Trace around it
The marked outline
3The marked outline
Cut out the opening
4Cut out the opening

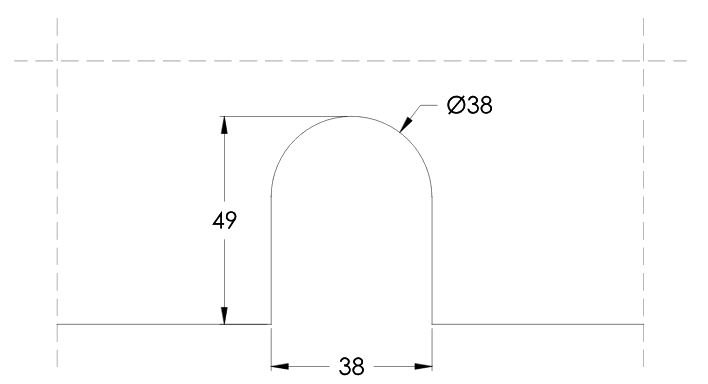
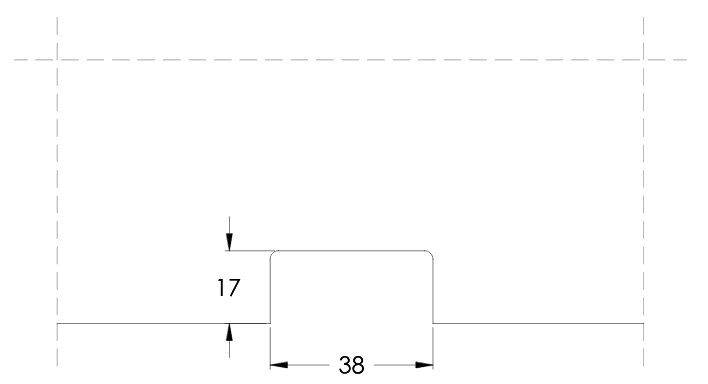
Cut-out dimensions

Cut-out for the motor (front)
Cut-out for the end cap (back)
Cut-out for manual use (front and back)
3Fixing the guide

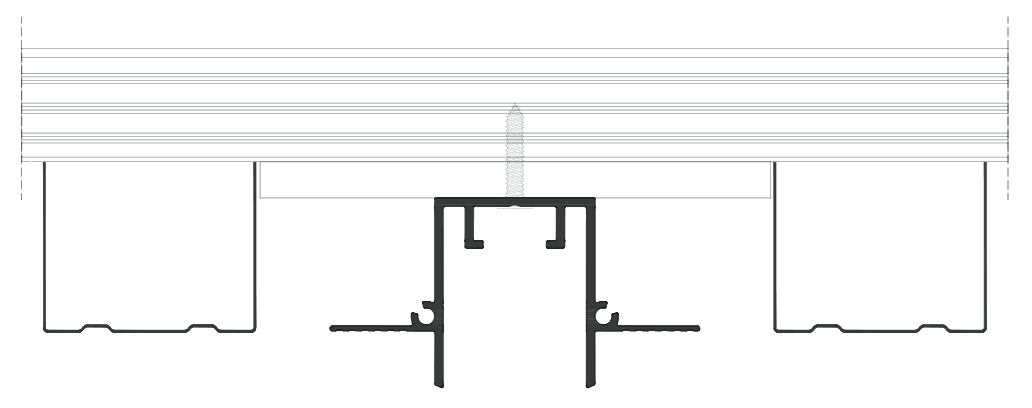
Screw the guide to the ceiling, onto the frame that carries the plasterboard or onto any other suitable support (timber, etc.).

Note. The mounting frame shown is indicative.
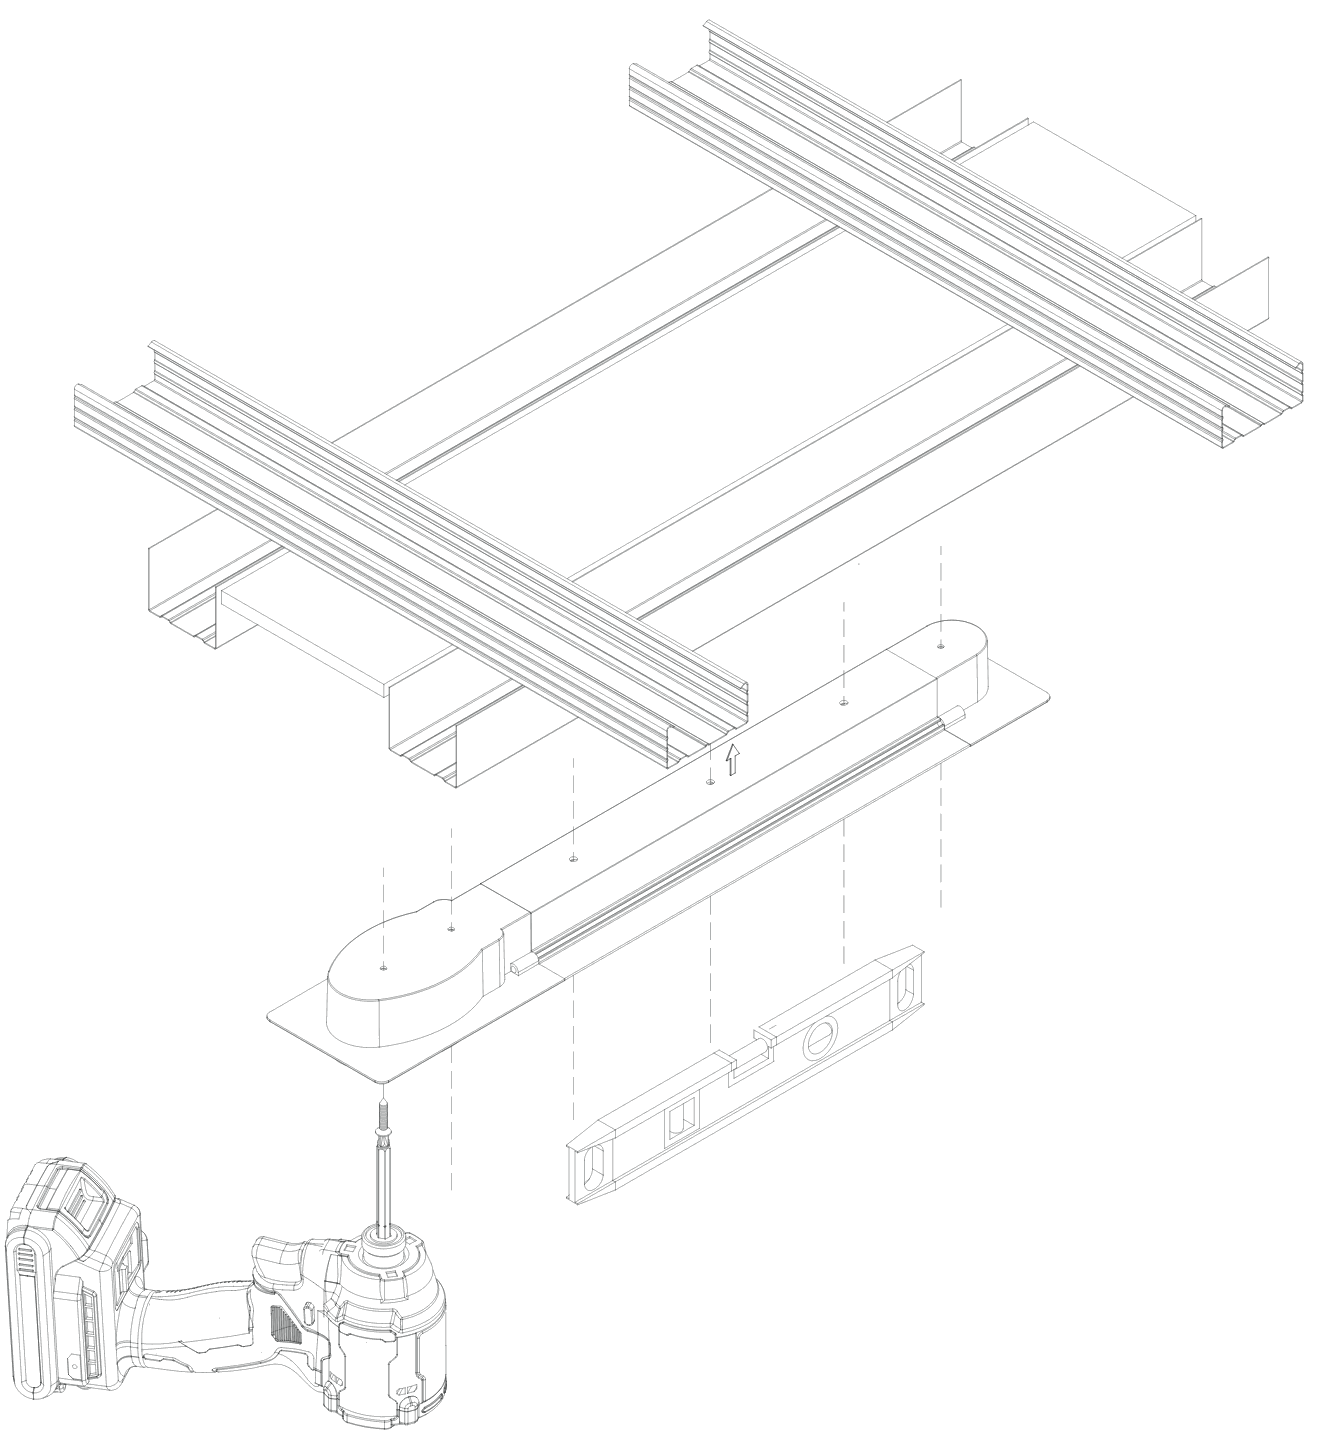
Fixing the guide
Section: the guide screwed to the ceiling frame.
4Plasterboard and track
Cable hole

Cable hole

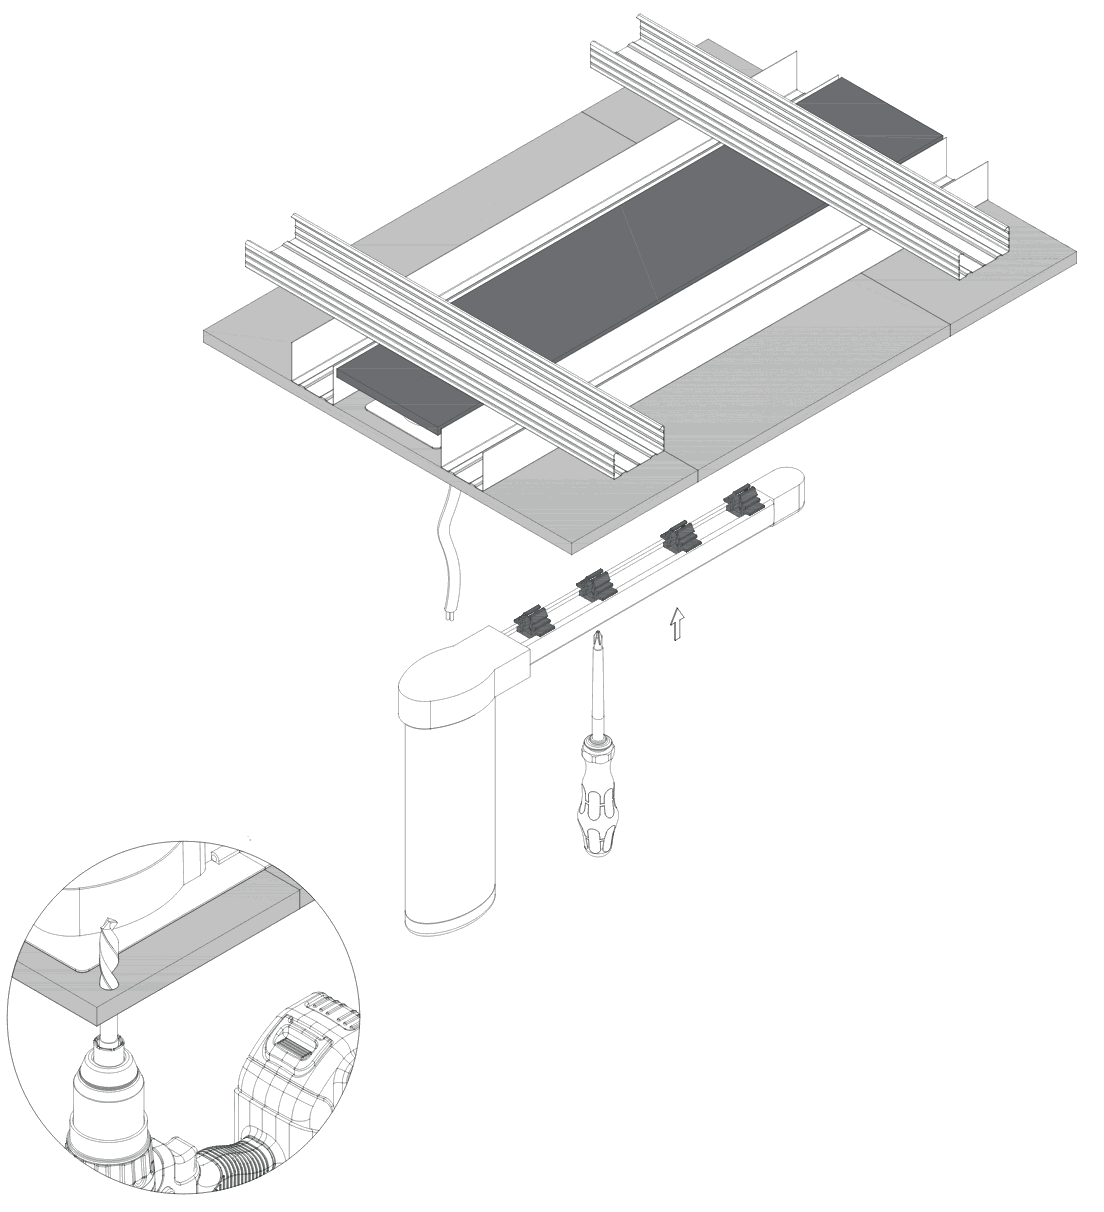
On the plasterboard, on the side where the motor will be installed, make a Ø10 hole for the cable to pass through.
Screwing the plasterboard

Screwing the plasterboard

Screw the 12.5 mm plasterboard to the guide every 300⁠–⁠400 mm along its length.

Fitting the track

Fitting the track

Place the track in the guide and tighten the screw inside the profile until you feel resistance. Do not overtighten.

5Finishing the plasterboard
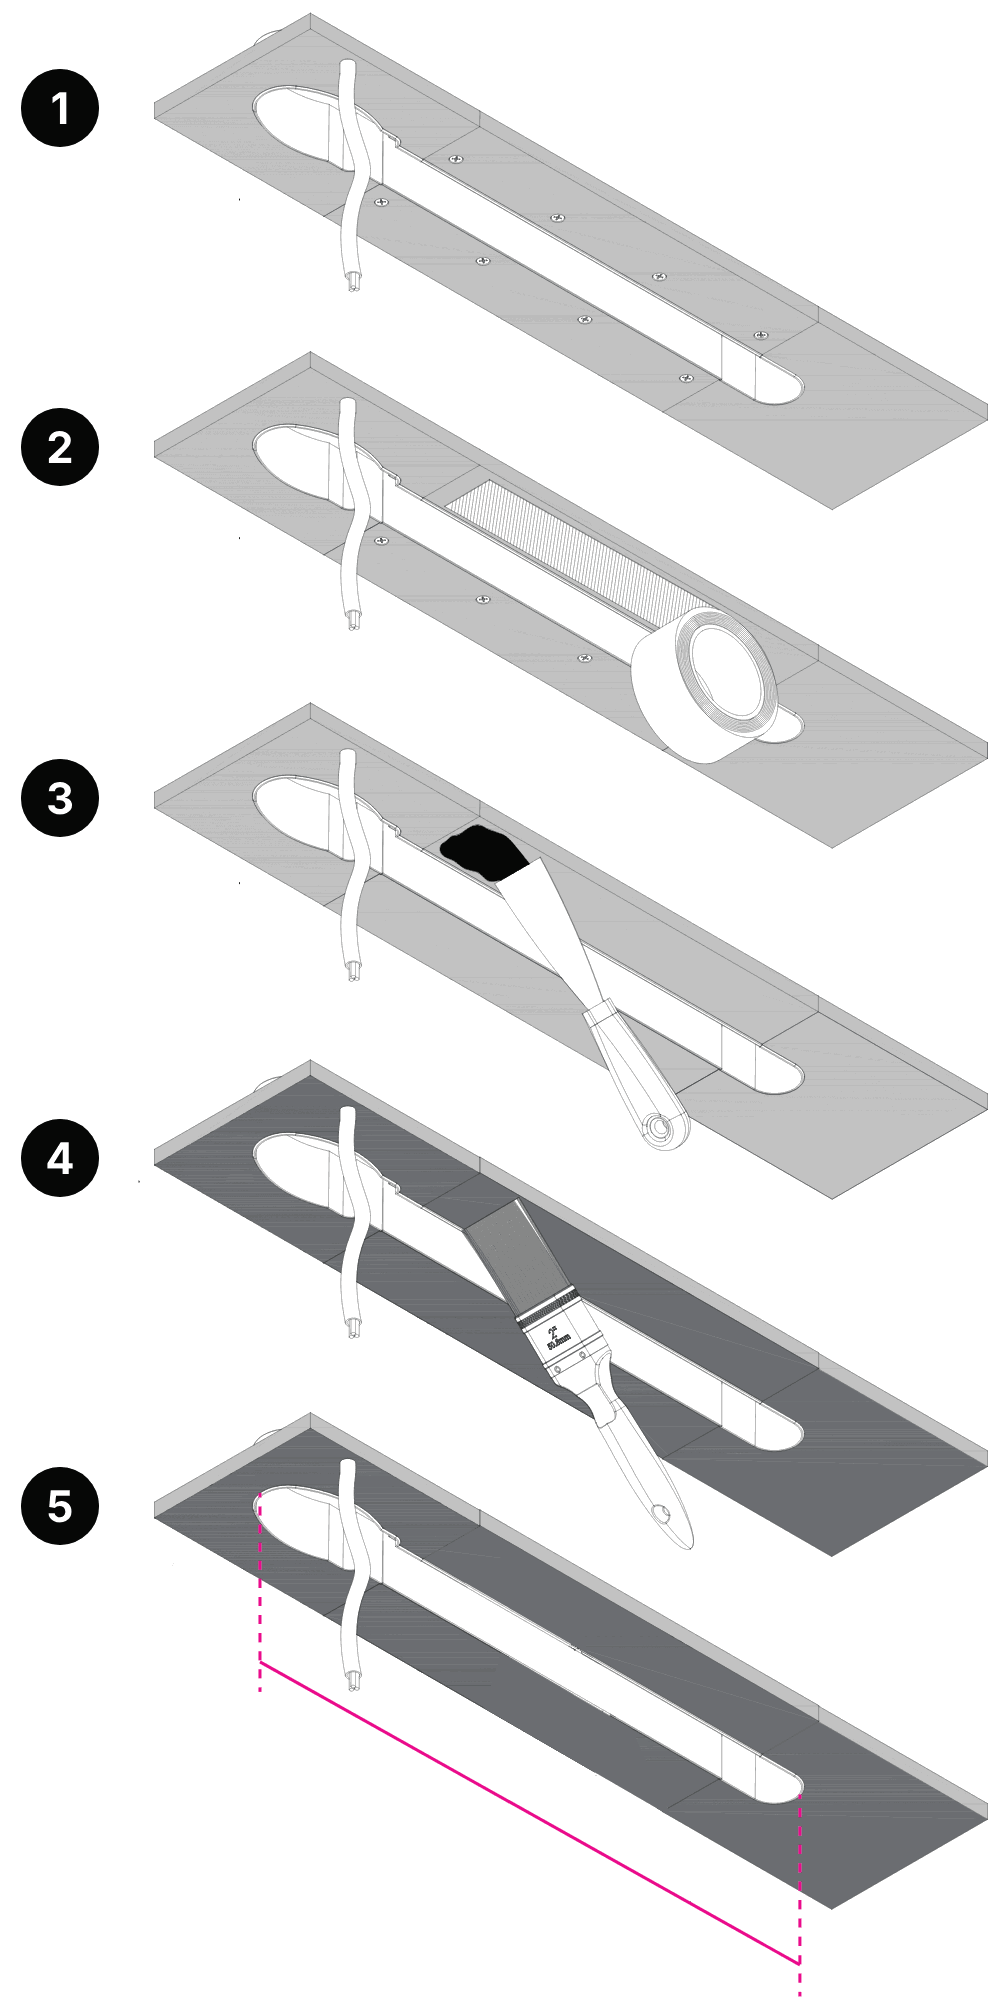
Finishing the plasterboard
Screw the plasterboard to the guide
Fit mesh (optional)
Plaster
Paint
Take the final measurement for the track, inside the guide, for the order

Colours

WhiteBlackCustom colour

Stock colours: white and black. Custom colours on request.

Contact

For prices, lengths and custom colours, talk to our team.

3 Evias Str., 15125 Marousi, Greece
+30 210 6120277
This email address is being protected from spambots. You need JavaScript enabled to view it.

Back to top
× nophoto

‹

›

YOUR CART